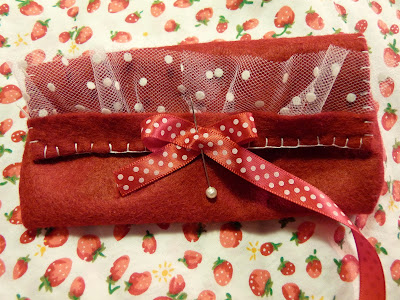
Weather is gettinng worse every day, so I was thinking about most used things in this season. First thing I came with were tissues! I'm sick quite often, so for me are tissues very important! SO...
How to replace a boring plastic tissue package...
... for a cuter one!
First, we need to prepare:
- One package of tissues
- felt
- scissors
- thread in felt colour
- pins and needles
- pen
- decoration stuff (bows, ribbons, lace, pearls etc.)
- glue gun
- buttons or velcro
You need to measure how much of felt you will need.
You have to roll inside whole package, plus few mm's more for sewing.
Cut, cut, cut...
This big is felt I'm going to work with. 3x width of package and 1 cm more to the lenght.
Rolled together. I curved edge, because it was too long, but you can also cut it off.
This is how it looks so far! x)
I marked end of the pocket...
...and sewed together.
Done! Let's turn it inside out.
As you can see, the upper part is a bit bigger.
So, I pinned the sides in...
...and sewed them. If you can't do this stitch, follow the pictures:
I hope it's clear enough...
When it's done! What to do with curved edge?
I found peace of dotted tulle.
Cut it in halves...
...gather together...
like this
...and glue it under edge.
Tadaaa! You have a nice tulle ruffle. Now, let's decorate! There are so many options...
I like white pompoms most!
Let's glue them on!
Take some buttons or velcro...
...and glue them too.
On the backside, I decited to sew pearls.
It's a bit easier when you mark where you want pearl to be.
We're finally finished!
I hope you like final result ^^
Now, just enjoy your stylish sniffle!
Please tell me if you liked it, and if there are not too many pictures. I'm still only beginner bloger, so I'm learning with every new post. Thank you for reading! ^^


Žiadne komentáre:
Zverejnenie komentára